Exporting GA4 data from BigQuery to Snowflake
In a previous article, we have already explored how to export data grom GA4 to BigQuery. In instances, where we want to migrate data from BigQuery to another platform like snowflake, BigQuery offers a few options.
BigQuery Export options
Explore with Sheets:
Directly analyze and visualize your BigQuery data using Google Sheets.
Explore with Looker Studio:
Utilize Looker Studio (formerly Data Studio) for more advanced data exploration and interactive dashboard creation.
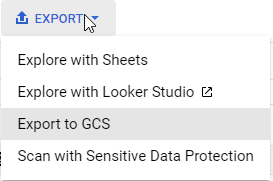
Export to GCS:
Save BigQuery datasets to Google Cloud Storage for storage or further processing with other tools.
Scan with Sensitive Data Protection:
Check your datasets for sensitive information before exporting, to ensure compliance and data privacy.
In out case, since we want to export the Google Analytics 4 data into Snowflake, we will need to first export it to Google Cloud Storage ( GCS ) . From this storage, we can then ingest data into Snowflake.
To understand the process flow, here is what we will be doing.
GA4 -> BigQuery -> Google Cloud Storage -> Snowfalke
A. Exporting from BigQuery to GCS
Deciding on Export Format
Before exporting, we want to decide on the format in which data will be exported for consumption. You can choose any of the format from CSV, JSON, Avro and Parquet depending on the use case. we will go with Parquet in this example. A brief comparison of these 4 data formats is given in the table below.
Feature | CSV | JSON | AVRO | Parquet |
|---|---|---|---|---|
Data Structure | Flat | Hierarchical | Hierarchical | Columnar |
Readability | High (Text-based) | High (Text-based) | Low (Binary) | Low (Binary) |
File Size | Medium | Large | Small | Small |
Performance | Low | Medium | High | Very High |
Schema Evolution | Not Supported | Not Supported | Supported | Supported |
Use Case | Simple analytics | Web APIs, Complex data | Long-term storage, Evolving schemas | Analytical queries, Large datasets |
Compression | Low | Medium | High | Very High |
Why Parquet?
Here’s a brief summary of why we chose Parquet for exporting GA4 data to BigQuery.
Columnar Efficiency
We benefit from Parquet’s columnar storage, optimizing our query execution by accessing only the necessary data.
Cost-Effective Storage
Our expenditure on data storage is minimized due to Parquet’s superior compression and encoding capabilities.
Support for Hierarchical Data
It supports our GA4 hierarchical data structures, ensuring the integrity of our analytical insights.
Seamless Integration
We utilize Snowflake’s native support for Parquet for straightforward data processing.
Schema Evolution Support
Since GA4 is in its early stage and new features keep on coming, we can gracefully manage changes in our data schema, avoiding costly downtime and data migrations.
Exporting Single Table
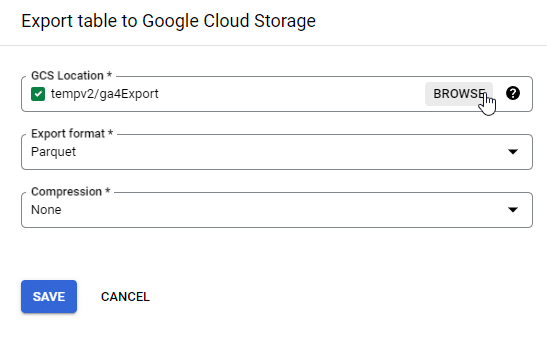
Clicking on the Export -> Export to GCS option will give us an option box to pick export format and compression. I have also specified a GCS storage location to store the export.
Exporting Multiple tables
Visual interface only allows export of a single table. Google Analytics 4, however, stores each day’s data separately as a single table. Therefore, we will have to find an alternative to visual export.
Shell script for Multiple table export
We can write a shell script which can export all our tables into our bucket. At a high level, we want our script to do the following :
- Set Parameters: Define the dataset, table prefix, and GCS bucket.
- List Tables: Use BigQuery to list all events_ tables in the dataset.
- Export Tables: Loop through each table and export it to the designated GCS bucket as a Parquet file.
Here’s what the exact script looks like
#!/bin/bash

  # Define your dataset and table prefix

  DATASET="bigquery-public-data:ga4_obfuscated_sample_ecommerce"

  TABLE_PREFIX="events_"

  BUCKET_NAME="tempv2"

  # Get the list of tables using the bq ls command, filtering with grep for your table prefix

  TABLES=$(bq ls --max_results 1000 $DATASET | grep $TABLE_PREFIX | awk '{print $1}')

  # Loop through the tables and run the bq extract command on each one

  for TABLE in $TABLES

  do

      bq extract --destination_format=PARQUET $DATASET.$TABLE gs://$BUCKET_NAME/${TABLE}.parquet

   done
Save the script and give it a name. I named it export_tables.sh. Change the script mode to chmod +x.
Execute the shell script with ./export_tables.sh
If everything works out correctly, you will start to see output :

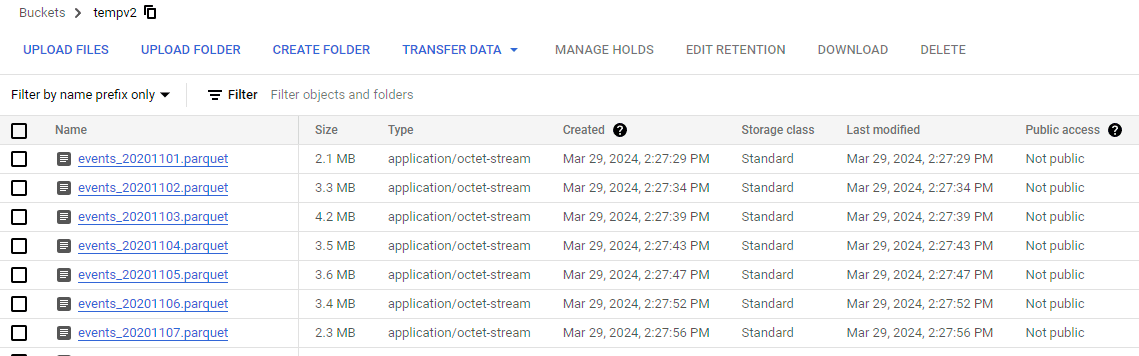
You can check whether data has been exported by inspecting the contents of the storage bucket.
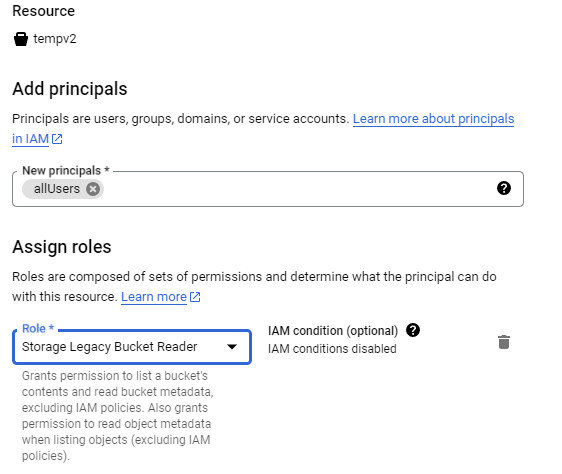
Allow appropriate access , so that you can read the data in snowflake. You can do this by opening the bucket > Permissions and then click on Grand Access.
In this example, I have granted access to allUsers. This will make the bucket readable publicly.
To ingest the data from Google cloud storage into snowflake, we will create storage integration between GCS and snowflake and then create an external stage. Storage integration streamlines the authentication flow between GCS and Snowflake. External stage, allows snowflake database to ingest the data.
Top of Form
B. Create Storage Integration in Snowflake
Storage integration in snowflake will create a temporary service account. We will then provision access to that temporary account from GCP.
- Log into Snowflake: Open the Snowflake Web UI and switch to the role with privileges to create storage integrations (e.g., ACCOUNTADMIN).
- Create the Storage Integration:
CREATE STORAGE INTEGRATION gcs_storage_integration
TYPE = EXTERNAL_STAGE
STORAGE_PROVIDER = GCS
ENABLED = TRUE
STORAGE_ALLOWED_LOCATIONS = (‘gcs://tempv2/’);
- Retrieve Integration Details:
DESC STORAGE INTEGRATION gcs_storage_integration;

Snowflake will automatically create a GCP service account . We will then go back to Google Cloud to provision necessary access to this service account.
- Navigate to GCS: Open the Google Cloud Console, go to your GCS bucket’s permissions page.
- Add a New Member: Use the STORAGE_GCP_SERVICE_ACCOUNT value as the new member’s identity.
- Assign Roles: Grant roles such as Storage Object Viewer for read access

C. Create External Stage in Snowflake
External stage will allow snowflake database to ingest data from external source of GCP.
- Define the File Format (if not already defined):
CREATE OR REPLACE FILE FORMAT my_parquet_format
TYPE = ‘PARQUET’;
-
Create External Stage
CREATE OR REPLACE STAGE my_external_stage
URL = ‘gcs://tempv2/’
STORAGE_INTEGRATION = gcs_storage_integration
FILE_FORMAT = my_parquet_format;
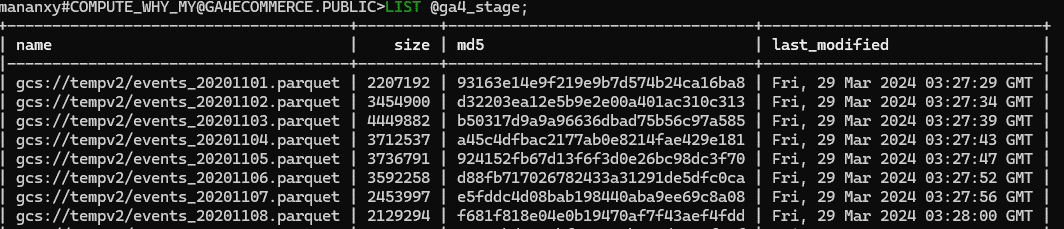
- Verify the external stage with LIST command, you can see the output
- Create table to load data into
We will create a table , so that we can load data from the stage into the table.
create table raw_ga4 (
data VARIANT
)
- Load data from stage
Finally, we can load data from external stage into snowflake database table using COPY INTO command.
There are 2 primary ways that we can ingest data into snowflake database.
- With an upfront Schema
- Without an upfront Schema
In this case, we will ingest the data without having an upfront schema.
D. Loading data without Schema
Snowflake provides a ‘VARIANT’ data type. It is used to store sem-structured data such as SON, Avro or Parquet etc. Its useful because it allows you to ingest and store data without needing to define a schema upfront. The VARIANT column can hold structured and semi-structured data in the same table, enabling you to flexibly query the data using standard SQL alongside Snowflake’s powerful semi-structured data functions.
Therefore, in Step4 , we create a simple table with VARIANT column of data.
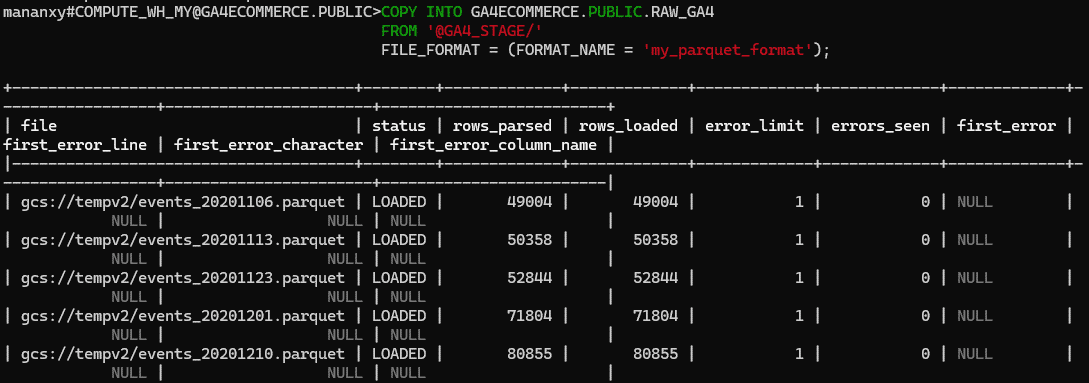
To load the data into our raw_ga4 table, we use the following command.
COPY INTO GA4ECOMMERCE.PUBLIC.RAW_GA4
FROM ‘@GA4_STAGE/’
FILE_FORMAT = (FORMAT_NAME = ‘my_parquet_format’);
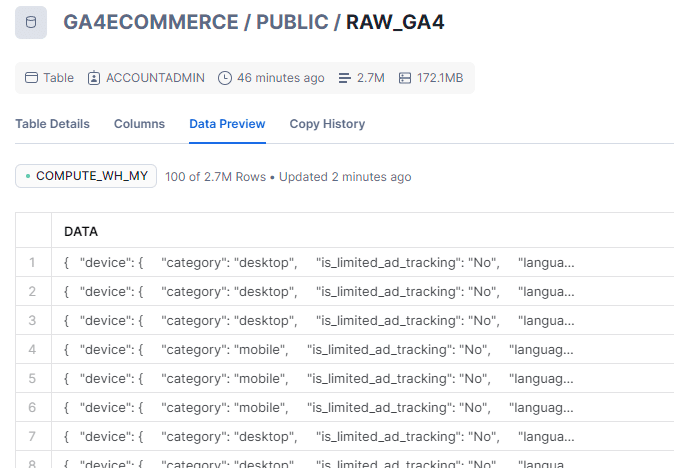
This will load all files into Data column
You can also view the data from Data Preview tab of RAW_GA4 table , which will look like :